GitHub Actions: How to Compile and release a React Native Android app

GitHub Actions is a tool integrated into Github to perform tasks related to the repository given an “event”.
I must give credit to this post and its Youtube video because I was of great help in this regard.
If you’re in a hurry, here’s the repo containing the whole file of this tutorial.
How GitHub Actions works
As I said it’s a tool integrated into GitHub to automate processes related to the repository. It works by declaring a .yml (you can find a complete view of YAML files in this article) in the relative of your repo: /.github/workflows/
In those files will live the configurations of the tasks that will be executed when a given event occurs on the repo: push, pull requests, issues, tags, etc.
Where to begin?
Well, if you’re completely new to this I suggest starting to create a folder in the root of your project called .github. Inside there, create another folder called workflows (yes, this is the path that I mentioned before).
Then create a file with the .yml extension. You can call it whatever you want but I’ll call it: build-android.yml.
And finally, enable Github Actions in the Actions tab:

With that, we are ready to begin.
Considerations for this tutorial
You don’t need to be the owner of the repository to make this tutorial. If you have access to it like a contributor it’s enough.
I’ll gonna compile multiple .apk files for different architectures of CPUs, and if you only gonna compile one .apk then you can do it just fine.
Steps
Name the Action
At the top of the file put whatever name you want the action to have. You can do it like this:
name: Build Android .apk
Name of the runtime (optional)
By default, the action in the Actions tab will run with the name of the commit that triggers it, but you can change that by putting run-name in the file. Like this:
name: Build Android .apk

run-name: "Building the .apk with the tag triggered by @${{ github.actor }}"
The workflow running will look like this:

The ${{ [github.actor](http://github.actor) }} is a variable that Github provides with the user that triggered the action: GitHub Object.
Event Trigger
In this part, you can put any event that you see fit, but since this is a tutorial to create a release with the output, then it’s necessary to use git tags to trigger the action.
name: Build Android .apk

run-name: "Building the .apk with the tag triggered by @${{ github.actor }}"

permissions:
  contents: write

on:
  push:
    tags:
      - "v*"
The "v*" means that the tag name must start with v, but you can put it like this to trigger it at any tag: "*".
Jobs
Jobs are different processes that can run in parallel (or in sequence) in GitHub Actions. For this tutorial, we’ll not gonna worry too much about it, but I’ll leave you some resources for you to deep dive into it:
Youtube: 5 Ways to DevOps-ify your App - Github Actions Tutorial
For now, I’ll gonna call this job as build (but you can call it otherwise if you want) and say it to run on the latest version of Ubuntu:
jobs:
  build:
    runs-on: ubuntu-latest
Steps Object
Before we start giving instructions on how to compile the app, first let’s declare the step object that will wrap the processes:
jobs:
  build:
    runs-on: ubuntu-latest

    steps:
Setting the repository
Now, this is the part that we all have been waiting for: The Actions of GitHub Actions.
To use them you need to declare a name and a uses parameter. You’ll see the pattern with the rest of the tutorial.
Use the checkout action to move to the root of your project:
steps:
    - name: Checkout repository
      uses: actions/checkout@v2
Installing Java
Use the Java action with the Gradle version:
- name: Install Java
    uses: actions/setup-java@v3
    with:
      java-version: "11"
      distribution: "adopt"
      cache: "gradle"
Validate Gradle (optional)
I’ll not gonna lie to you, this is something that I saw in the tutorial that I mention but I suppose that you can do it without it anyway.
- name: Validate Gradle wrapper
  uses: gradle/wrapper-validation-action@v1
Installing Node.js
Setup node with the GitHub Action:
- name: Setup Node
  uses: actions/setup-node@v3
  with:
    node-version: '16'
With this, you will set up yarn and npm if you need them. In my case, I’ll use yarn for the rest of the tutorial, but it will depend on your use case.
Installing dependencies and building the project
As I said, I’ll use yarn for this but it will depend on you.
- name: Run Yarn Install
  run: yarn install

- name: Build application
  run: yarn release
The release script in the package.json file looks like this:
"release": "cd android && ./gradlew assembleRelease",
List the compiled files (optional)
This is just to see the name of the .apk files in case you need to see them to do something else.
- name: List the .apks compiled
  run: ls ./android/app/build/outputs/apk/release/ -hal
Changing the name of the main .apk file (optional)
This is not necessary, but I’ll add it anyways because it’s better to download the .apk, when needed, with the version that has a semantic name.
In this case, I’ll rename the app-universal-release.apk, but in your case, it might look different. So be aware of that.
- name: Rename the .apk to the tag version
  run: mv ./android/app/build/outputs/apk/release/app-universal-release.apk ./android/app/build/outputs/apk/release/app-name_${{ github.ref_name }}.apk
The {{GitHub.ref_name }} has the version name of the git tag.
Creating Release and Uploading Files
Finally, the GH Release Action to create the release and push the .apk compiled.
As I said, I’ll upload many files because I’m compiling a .apk for each CPU architecture, in your case it could be only one, but don’t worry I’ll show you how to do it as well.
- name: Create Release and Uploading Files
  uses: softprops/action-gh-release@v1
  if: startsWith(github.ref, 'refs/tags/')
  with:
    files: |
      android/app/build/outputs/apk/release/app-arm64-v8a-release.apk
      android/app/build/outputs/apk/release/app-armeabi-v7a-release.apk
      android/app/build/outputs/apk/release/app-x86_64-release.apk
      android/app/build/outputs/apk/release/app-x86-release.apk
      android/app/build/outputs/apk/release/app-name_${{ github.ref_name }}.apk
In the files part, in case you want to upload only one file, do it like this:
files: android/app/build/outputs/apk/release/app-name_${{ github.ref_name }}.apk
Or
files: android/app/build/outputs/apk/release/app-universal-release.apk
Results
Well, the result would look something like this:
name: Build Android .apk

run-name: "Building the .apk with the tag triggered by @${{ github.actor }}"

permissions:
  contents: write

on:
  push:
    tags:
      - "v*"

jobs:
  build:
    runs-on: ubuntu-latest
    # runs-on: ubuntu-22.04 # this is the Ubuntu version that this was created on

    steps:
      - name: Checkout repository
        uses: actions/checkout@v2

      - name: Install Java
        uses: actions/setup-java@v3
        with:
          java-version: "11"
          distribution: "adopt"
          cache: "gradle"

      - name: Validate Gradle wrapper
        uses: gradle/wrapper-validation-action@v1

      # Node, Yarn and NPM
      - name: Setup Node
        uses: actions/setup-node@v3
        with:
          node-version: '16'

      - name: Run Yarn Install
        run: yarn install

      - name: Build application
        run: yarn release

      - name: List the .apks compiled
        run: ls ./android/app/build/outputs/apk/release/ -hal

      - name: Rename the .apk to the tag version
        run: mv ./android/app/build/outputs/apk/release/app-universal-release.apk ./android/app/build/outputs/apk/release/app_name_${{ github.ref_name }}.apk


      # Creating and Uploading the releases
      - name: Create Release and Uploading Files
        uses: softprops/action-gh-release@v1
        if: startsWith(github.ref, 'refs/tags/')
        with:
          files: |
            android/app/build/outputs/apk/release/app-arm64-v8a-release.apk
            android/app/build/outputs/apk/release/app-armeabi-v7a-release.apk
            android/app/build/outputs/apk/release/app-x86_64-release.apk
            android/app/build/outputs/apk/release/app-x86-release.apk
            android/app/build/outputs/apk/release/app_name_${{ github.ref_name }}.apk
Remember that everything we did is in the repository of this tutorial.
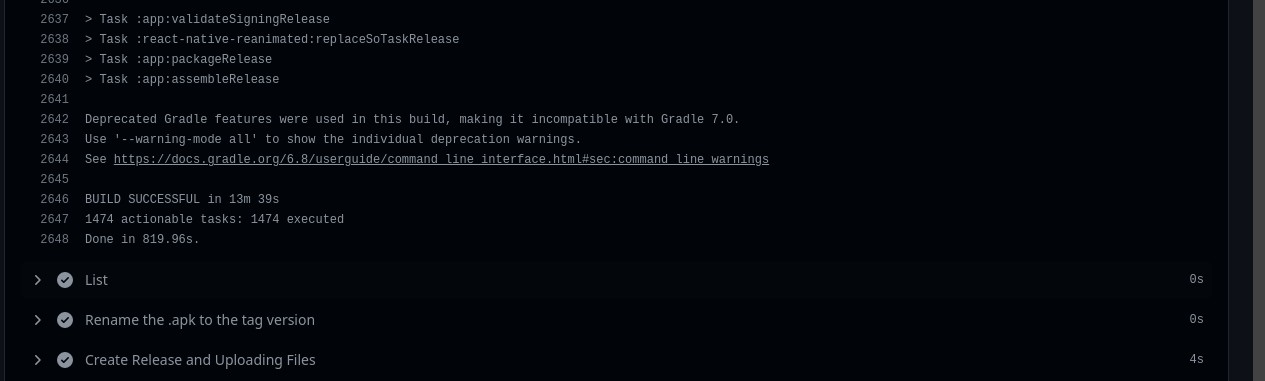
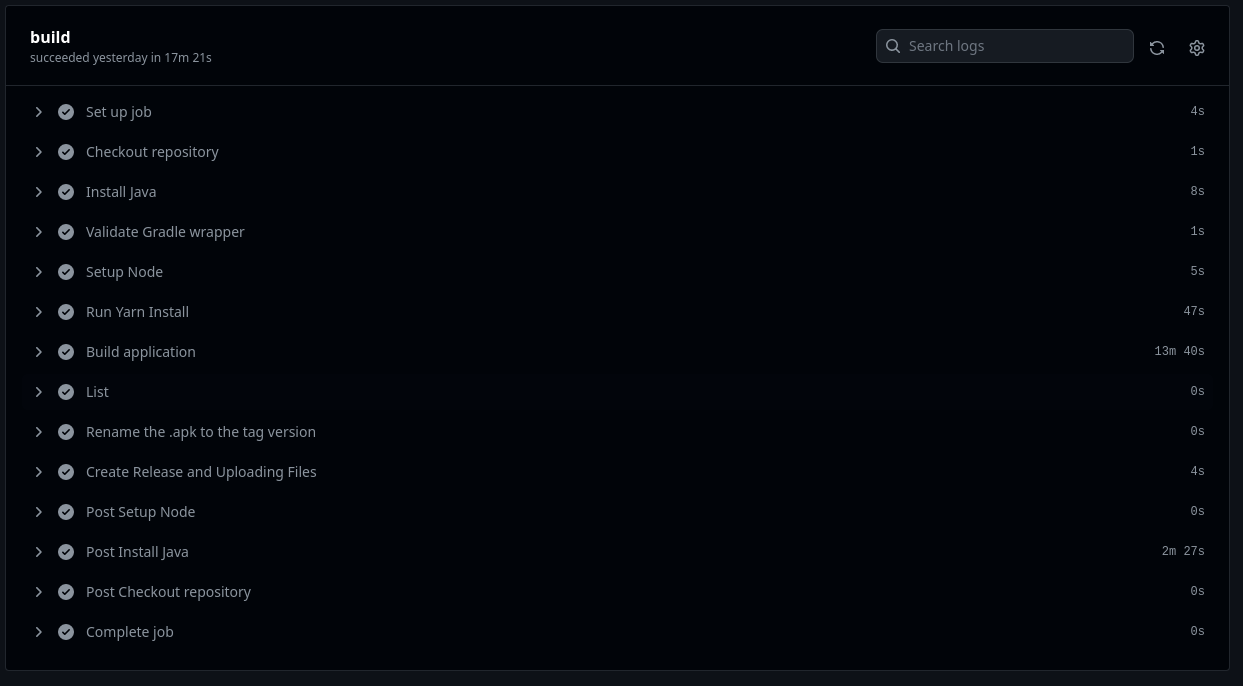
After you commit the file and push a tag into your repository you’ll see something like this in the Actions tab:
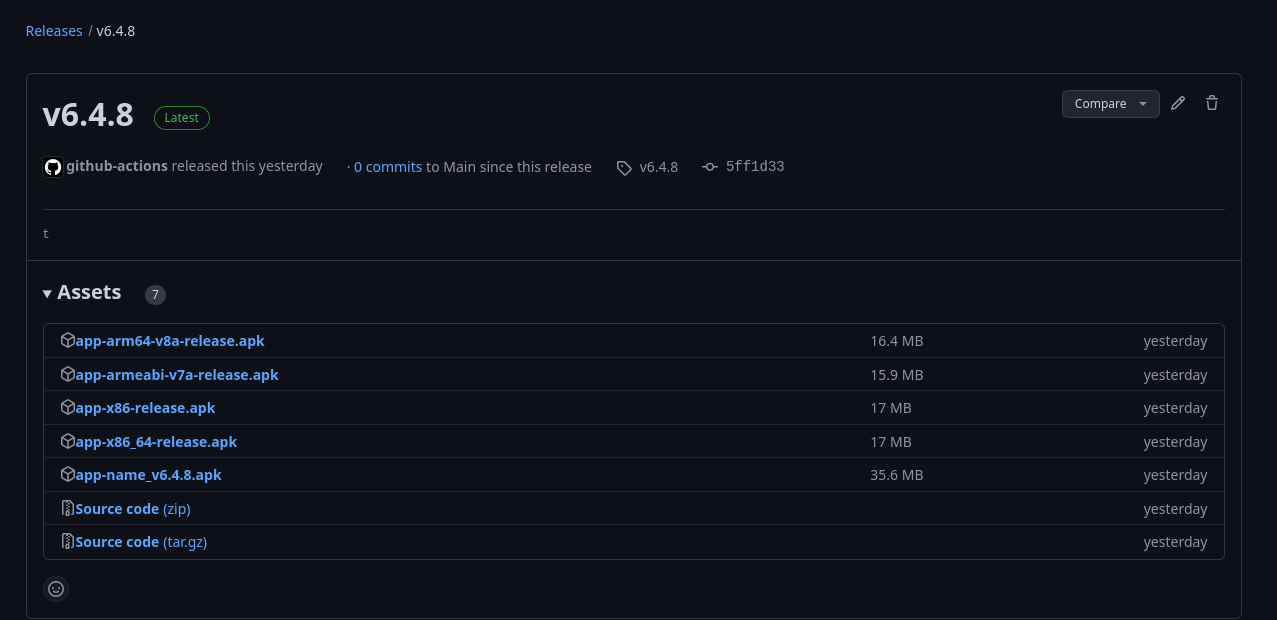
And you’ll also see the release:
Well, that’s it for me now. Please let me know if it was useful to you or if you had any issues.
Follow me on Twitter, LinkedIn, Instagram, Github, Medium (For more opinion-based posts), and here on Hashnode and my Hashnode blog.
Have a nice day and until next time. Bye.
About the author
I'm passionate about the world of software development, I never thought that I was going to understand it, but I'm glad that I challenged myself to learn it.
Comments
Join the discussionNo comments yet. Be the first to comment.


